Oven Bulbs Are Not Ordinary Bulbs
Oven bulbs are specialist high temperature bulbs designed to withstand the extreme heat inside an oven cavity. You cannot use a standard household bulb. There are two types — SES screw fitting and G9 halogen — and getting the right replacement matters more than most people realise.
Oven bulbs are classed as sundry consumable items and are not covered by any manufacturer warranty.
The Two Types of Oven Bulb
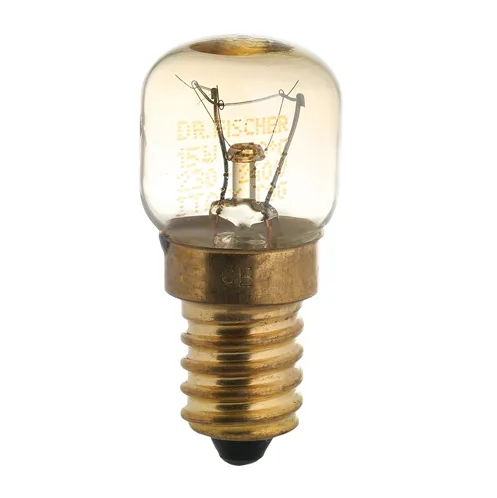
SES — Brass Thread
The SES (Small Edison Screw) E14 bulb screws into a threaded fitting in the oven. It is rated to 300°C and comes in 15W or 25W — the 25W is brighter and may be slightly larger. The most important thing when buying an SES oven bulb is to buy one with a brass coloured thread. FixCookers carries and recommends Dr Fischer bulbs, available on Amazon.
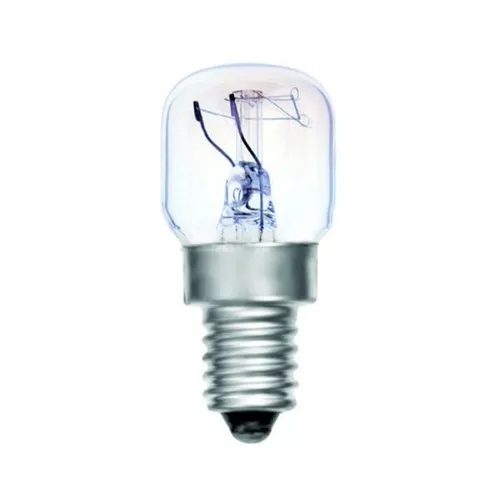
SES — Silver Thread
Silver threaded SES oven bulbs are widely available in supermarkets, budget shops and DIY stores. In the opinion of FixCookers, based on 30 years of experience, these are not the best quality. They tend not to last long, and when they fail they can cause damage to other components — including welding contacts together on switches. Always buy brass threaded.
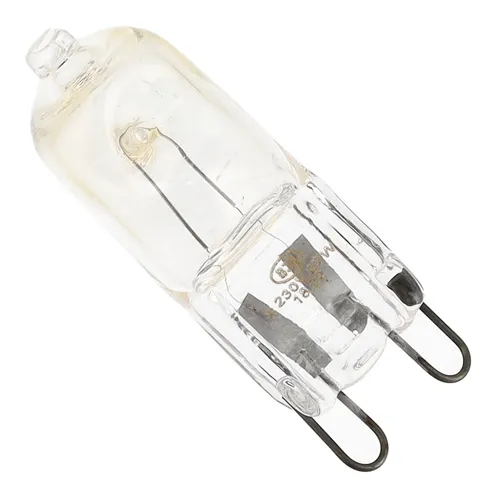
G9 Halogen Bulb
Some ovens use a G9 halogen bulb instead of an SES fitting. These push in and pull out rather than screwing in. Check your oven's user handbook to confirm which type your oven requires. FixCookers recommends Dr Fischer G9 bulbs, available on Amazon.
Why Oven Bulbs Blow
In addition to normal wear and tear, oven bulbs are vulnerable to vibration. The fan motor in a fan oven generates vibration, and everyday actions — opening and closing the oven door, sliding trays in and out — all create minor vibrations that can shorten bulb life. This is normal and unavoidable.
How to Replace the Bulb
Safety First — Turn the Power Off
Always turn the oven off at the wall or isolate it at the fuse box before replacing the bulb. If you have an automatic timer clock, remember you may need to reset it afterwards — see our guide on setting your cooker clock.
Step 1 — Remove the Glass Cover
The bulb is protected by a glass cover inside the oven cavity. There are two types:
- Rectangular glass covers — typically prise off. Use a flat implement carefully to lever it away from the fitting.
- Round glass covers — unscrew anticlockwise.
Both types can be difficult to remove after years of use — grease bakes into the thread or fitting and sets hard. A set of pipe grips can help with the round type, but take care — the glass can crack if too much force is applied. There is no gasket behind the cover that needs replacing.
Step 2 — Remove the Old Bulb
SES bulbs — unscrew anticlockwise. If the bulb has cracked and the glass has shattered, leaving just the metal thread end in the fitting, grip the metal thread with a pair of snipe-nosed pliers and unscrew carefully. Make absolutely sure the power is off before doing this.
G9 halogen bulbs — pull straight out of the fitting.
Step 3 — Fit the New Bulb
SES bulbs — screw in clockwise, finger tight.
G9 halogen bulbs — Dr Fischer G9 bulbs come in a small bubble wrap sleeve. It is recommended to leave the sleeve on while pushing the bulb into the fitting. Grease from your fingers on the glass phial of a halogen bulb can create a hot spot which can cause it to fail prematurely. Avoid touching the glass directly where possible.
Step 4 — Replace the Cover and Test
Replace the glass cover, restore power, and test. If the oven does not come back on after replacing the bulb, check the clock — see our guide on setting your cooker clock.
Need Help With Your Oven? Call FixCookers
If your oven has a fault beyond a blown bulb, FixCookers repairs most cooker and oven faults across Sheffield, Rotherham and Barnsley.

07951 899378
WhatsApp Us
